January 29, 2014

Heart In A Box Card


Wow... I love it when other demonstrators share their work and then we can take it and reshape, recreate, copy, CASE... however it works for you.... in this case, I used Monica Gale's box in a card she created and I created my own for Valentines.

She listed her instructions in centimeters, but I work in Inches, so I rewrote my own dimensions in inches and made mine a square box.  I ws trying to get it to fit into a 5x5 square envelope... well, that worked for my winter one, but not this one... The hearts are just too big!  No worries though, I can still mail it because Stampin'Up! has the fantastic Envelope Punch Board that will make any size envelope... pretty much, so, I just make my own envelope in less than 30 secs!  Check it out: 

And you can purchase one here:  24/7
 
At the end I'll show you some other things  you can make with this wonderful little tool... Oh yeah!  What, you thought it only made envelopes?  No way!  Stay tuned at end!
 
Back to my Card... Here it is in all it's Heart Splendor... Tah Dah!!
 
 
This card opens up like a flower... or so I think... to display what's inside and it sits up, so it's like a bouquet of flowers (hearts) that you can keep on your desk, table... anywhere really.    Since Valentine's is coming up I really wanted to make one of these so I can send it.
 
So here are my instructions:
 
You'll need:
 
8.5 x 11 sheet of Cardstock for box
Designer Paper (optional) if you choose to decorate the box flaps and base.
Vanilla or other coordinating color cardstock to create back flap behind hearts
Sticky Strip, glue dots, dimensionals 
Paper Snips
Paper Trimmer
Simply Scored Scoring Tool (shown in pic, but optional if you can work with the trimmer)
Embellishments: Try different Dies to cut out shapes and words... I used my hearts Framelits and the Hearts a flutter one for all the hearts.. for the word "Love" I used the Epressions Thinlits dies from our Holiday catalog.
I used silver Baker's twin to hold my banner in the largest heart.
Punches and Stamps ( I used my Banner Blast stamp set and Banner punch to make all my little banners... New from the Sale-A-Bration mini catalog that I got FREE!)  I also used The Follow My heart Stamp set from the whole lot of Love suite of stamps...
 
So here are the measurements:  (Where I refer to a color, it's referring to my pic above)
 
8. 1/2" x 11" Cardstock - Card base and tab inserts (Primrose Petals)
2 7/16" x 5" Cardstock - Vanilla (shows white in pic.... oops!) Back base of card
4 - 2 7/16" Squares - Designer paper for box base (under the flaps) Mine shows large multicolor hearts paper on box base.
4 - 2 7/16" Squares - Designer paper for box flaps and back upright flap (can be different than under flap paper) Mine are the tiny hearts on the flaps From More Amore Designer paper - now on clearance... you know where!
 
Other coordinating colors to punch out your embellies and decorate the box... my colors are: Pool party, Real Red, Primrose petals, Basic Black and vanilla
 
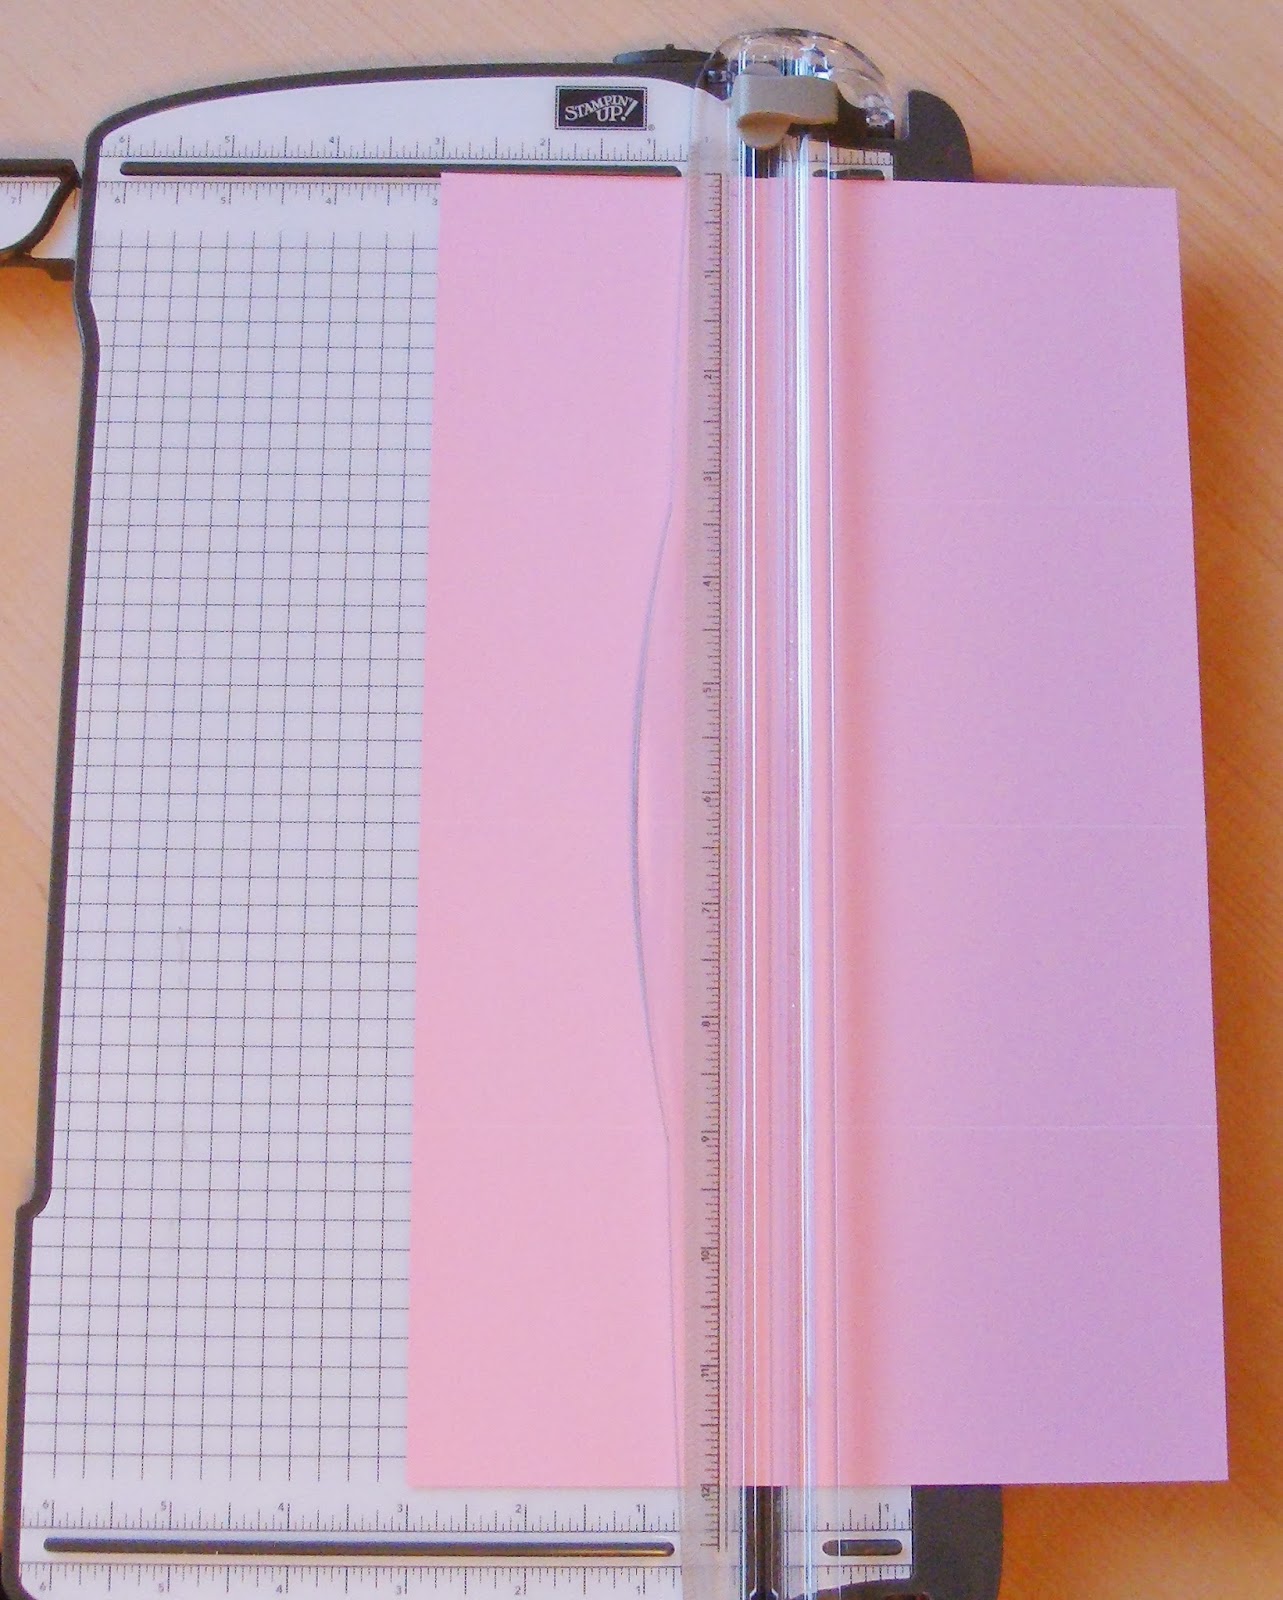
1.  Take the 8 1/2" x 11" cardstock and score on long side at: 2 5/8", 5 1/4", 7 7/8" and 10 1/2"
 
 
Turn cardstock counterclockwise so the smallest scored rectangle is now on the top ruler of the scoring board ... score at 2 5/8".  remove the cardstock and insert the piece in a paper trimmer just like you had it in the scoring tool... now measure to the 5 1/4" mark (same side as last mark you made) and cut down... you will now look like this... you'll have a left over piece (right in pic) which you will save to make your tabs in step 5. 


2. Taking the cardstock that now has all the squares on it... you will want to cut into the squares as shown in the next pic (follow yellow lines and cut out grey area completely) These are  your box flaps...


3.  Fold your score marks so that they are flexible and ready to assemble.  Lay your box as shown... and bring the littlest tab in ...  smallest tab in this pic is the one on the bottom left of squares that make the base...
 
 
add some sticky strip to this 1/2" tab and then fold the last two squares until they meet the tab.  Press shut... you should now have something that looks like this... flaps on top... and little tab tucked inside box...


4.  At this point I also adhere the Vanilla strip to what'll be the back tall flap of my box  and all my designer paper to the bottom of box (under flaps) and on top of the Vanilla still on box base.  Open the flaps and adhere the other 4 pieces of designer paper to the flaps and the back straight flap too.
 
See pic:
 
Box bottom... under the flaps... front and side:
 
 
Box bottom with the Vanilla piece adhered first (it'll cover the flap and bottom) and then I adhered the Designer Paper on top of the Vanilla so my box was wrapped all the way around...
 
 
 All 4 Flaps decorated... including the back straight one... pictured here with hears upside down... top  left pic...  I had to rotate that square... due to directional paper.  Be careful! 


View from behind box...
 
 
View from front with the inserts in Step 5 below... 


5. Creating the insert tabs:  
A. Take the piece of cardstock from step One that you set aside... flip it so that the score lines are vertical on a paper trimmer... you will want to cut a 1/2" inch in from the second to last score line from the right... see yellow cut mark in pic here:


B.  Once cut, take this new square with 1/2" score marks and turn it so the score marks are laying horizontal on the paper trimmer... measure 1" and cut... again another 1" tab... now you have 2- 1" tabs with 1/2" score marks on each end... see here:


You can discard the other or use it (I used 3 tabs on mine)
 
C.  You will add sticky strip on one end of the tab and flip over the piece and add sticky strip to the other end on the opposite side... this is because when you insert the tabs.. they go in like a Z... so you need tape on each tab.  Do this to all tabs and evenly space them in your box from back to front so that when you add your embellishments.. they are nicely spaced...
 
  
Your box is now assembled and you can decorate as you wish... I added Hearts to the front of the inserts, so that they show the whole heart... you could tuck behind if you prefer, but in this case I liked them in the front.
 
 
This is what it looks like flat so you can put it in the mail...


I hope this was helpful and  you have fun.. I'm working on my Easter one now.
 
Here's a link to Monica's winter sample... I made that one too!  Gorgeous!!
 
 
Oh, and I promised I'd show you other items you can make with the envelope punch board... check out my cute boxes!  I used them for Christmas gifts... you can make these in soooo many sizes in a matter of seconds.. no kidding.. really fast!


You can make Party Crackers, Boxes to hold stationary, or cards, treats... you name it!!
Until next time...
 
Sandra.


January 27, 2014

Washi Tape Dispenser and storage - Free Tutorial

I wanted to store and see my washi tapes because I love love love them and use them a lot..... so, I've been thinking about a container to store and a light bulb went off the other night... I figured out the container and now it's a container, clear and a dispenser too!  A lot of work went into the dimensions to maximize each sheet of acetate that I used and that the size would be easy to carry and store.

So, I'm glad I pulled out my foil wrap the other night .... basically, I used the same design, and since I just finished  roll.. I borrowed the serrated cutting blade from that box and used it on my box.  After assembling two boxes... I actually discovered that I don't need to use a serrated edge... the edge of the plastic container cuts the washi nice and straight! . BONUS!! 

So, here is my tutorial... hope you enjoy!  Let me know what you think...

Acetate 2 sheets in 8.5 x 11
Paper Trimmer (easiest and fastest)
scissors
Sticky Strip (you'll want a very strong adhesive to hold the  box together)
1" circle punch
Corner rounder punch
Designer Paper if you choose to decorate the box
Velcro with adhesive on back to use for closure
serrated edge  - from foil wrap container


NOTE: In this tutorial I used cardstock because it was too hard to show with clear acetate....

Box construction:

1.  Take your acetate sheet and place on your trimmer so that the 8.5 side is on tope and the 11" side is to your right along the cutting edge.  You will score at 1 7/8", 3 3/4", 5 5/8" and 7 1/2" (each section will be 1 7/8") and then the left over section will be 1" for the box closure flap.

2.  Turn the sheet 1/4 turn to left... so 11" is on the top and 8.5" on right cutting blade.  Score at 1 7/8" and then move the sheet to 6 5/8" and score... this will leave both side with 1 7/8" box sides.  This size works well with the Stampin'Up! washi tapes (and others).  It keeps them snug and cozy.
 
Let's describe the pic in step 2...
A is front of box with serrated edge,
B is the bottom of box,
C is back side,
D is the top (clear section) of box and
E is the flap that holds the box closed.
3.  So, you'll want to cut of the  squares to the left and to the right of the D and E rectangles. 
See pic:  You'll also use your 1" circle punch and punch out in center of the 1 7/8" square and cut off the small tab left.  Do this for both sides and hold on to those punched squares for step 11 below.
 
 
side tabs cut off and punched, then remove small rectangle
 
 
4.  So, You can now cut into the flaps that will be the 1/78" sides of the box.  To the left and to the right of A, B and C.... or labeled 1, 2 and 3 here:


5.  So, now you have your box all cut out.  the E flap, you'll want to use your corner rounder on the two corners, so as to not poke or cut yourself... makes the closure look nicer. Fold all the score marks so as to form the box... just so you get the feel and look of the box.. make any minor corrections on flaps etc.
 
6.  At this point, if adding serrated edge to A... you would adhere to inside of edge... right to the edge so it cuts.... I used sticky strip to adhere on the first box, then I just left the plastic edge without a serrated blade.  It cuts nice straight edges.
 
7.  Adhere sticky strip as follows to close box sides: in pic labeled with numbers for how you fold the sides in... A=3, B=1 and C=2
A -  sticky strip along all edges, but not the score mark
B - no sticky, but first to fold in
C - Along both edges parallel to the long rectangle... see marks in blue highlighter in pic below
 
 
You will adhere in order above:
B is first, fold in
C is next, stick to B
A is last and stick to B
This order will assure all sharp edges will be toward the back of the box where you don't see them.
See pic:


Adhere other side the same... you now have the box almost complete.  If you choose to decorate with Designer Series Paper.. now is when you would do so... if not, go to cylinder construction step 9
 
8.  For DSP:  cut a piece for front, bottom and back of box at: 7 1/8" x 5 5/8".  Score along short side at 1 7/8, 3 3/4" and the last section will be about 1 7/8", if not.. shorten it so it is.   Fold the scores well, so it sits in box easily.  I used my tape runner to adhere the inside front, bottom and back.  Then cut out 2 squares 1 7/8" square and tape to the sides of the box.
 
Cylinder inside to hold tapes:
 
You are going to make your own cylinder "tube" that will hold your tapes in place.. cardstock is not very giving and wrinkles a lot.  I like the plastic sheet, but it is challenging to stick down.

Pic of Finished cylinder inside box
 
 
9.  From Acetate sheet, you 'll need a piece that measures 3 1/4" x 7 5/8", along the long side, score at 3/8" and then at 7 1/4... you'll then take your scissors and cut in from edge to the 3/8 score mark.. make little snips at 1/4" intervals until the edge.  Do the same on the other edge...
See pic for reference.  It looks like a scarf with little fringe.


10.  Now, take a piece of Sticky Strip and add it to the center piece on the very edge.  You're going to make the tube now... roll the plastic and only remove about 2" or the red sticky strip cover to expose only that much adhesive... this is how you want to start... stick down that corner first and begin to maneuver the plastic to cover over the sticky strip so that the plastic only overlaps the width of the sticky strip, about 3/16" or a bit more.. no more than a 1/4" overlap... it'll make your tube too  narrow.  Once you have that 2"section stuck down, remove the remainder of the red cover on the sticky strip an adhere the rest of the tube, so it's pretty even.  Whew!!  That was the hardest part!
See pic here:


11.  Remember those squares with the circle punches in them (step 3)?  Bring them out... slide one on tube, and fan out the little fringed edges so it holds the square on tube. 


12.  Once you've selected which tapes you'll want to include on the tube, make sure you feed them on the tube after the square, so that the tape end.. sticky or not, all face the same direction.  In other words, you will want them to all peel open in the same direction.. towards you or away from you, but all the same. 


13.  Once your tube is full (not tight or they won't turn)slide in the second square with the circle punched out and open the fringe so it holds the square in place.  DO NOT GLUE TOGETHER.   **When you run out of a tape and want to replace one.. you can slide the whole tube out, remove the square and replace your tape.  Then reassemble and slide back in.  Easy Peasy!!
 
14.  Slide the cylinder in the box carefully.. one side first, then other... making sure that the tapes are all facing up.. in other words.. they will unravel If you pull up on the tape from the bottom up and toward the back of the box... see pic here:

One side first:
 
 
Inserted all the way
 
 
15.  Optional: Now, you can make little tabs for the ends of the tape or not.. they aren't necessary, but I added them in, see tapes up close below so you see what I mean.. on all other boxes I didn't do this. :)
 
16.  Last step In box assembly is to add a strip of acetate across the top of the tapes... I call it a "belt".  The belt measures: 3/4" x 7 7/8 long.  Score each side at 3/8" so you will have two 3/8" tabs that fold down.  This belt sits over the washi tapes a little towards the back of tapes and sticks down on each tab to the Side squares.  This is where you rest the the edge of your tape on...
  The washi will rest on the belt until you need to cut it.  See pic:
 Washi feeding from bottom front up towards back and resting on plastic belt
 
  
17.  When you wan to use the tape, just open the box and pull the desired tape from the belt...  pull up gently and slide back towards front of box.... over the edge and pulling at an angle, cut smoothly.  Then, take the tape, pull back up and over the plastic belt to hold for next time.


18.  To finish the box, I adhered a small rectangle of sticky back Velcro to the front flap of box and closed it snug.  This prevents any from falling out.  I covered it on the front with my label that says Washi, but you can cover with anything you like.


Please tell me if you end up making these and send me a pic... I'll post it! And let me know if the instructions were good.  I appreciate any feedback and hope you enjoy making these.   I already  have 6 that are full. 
 
 
 Until next time....

Sandra


January 22, 2014

Free Tutorial! Happy New Year! Treat Yourself to...


This cute little Treat box or a type of it has been circulating around for awhile, and I've been meaning to make one... and I did for Christmas and then modified it quite a bit to make my own.. I really wanted a treat dispenser that would close at the opening .... so, I came up with this one finally that suited my needs and is easy to duplicate in any size really.

Hope you enjoy this as much as I have making these....

What you'll need to duplicate mine:

Pool Party Card Stock in 12x12
Coordinating color cardstock (used Real Red in this sample) and Crumb Cake for bows
Heart was made with Real Red in the Co'Ordinations cardstock
Silver glimmer paper for (Love)
Designer Series paper (Fresh Prints from the new Occasions Mini)

Paper Trimmer (I used my Stampin' Trimmer... it does it all, well almost)
Paper Snips (scissors)
Sticky Strip  to adhere
Glue dots
Dimensionals
liquid glue (used mono liquid glue) My fav!
New: Spiral Flower Originals Sizzix Die and the Bigz L Die "Gift Bow
Expressions Thinlits dies (Love), Hearts collection Framelits and
Apothecary framelits
Itty bitty punches (small flowers)
corner rounder punch
Rhinestones Basic Jewels
Seam binding ribbon in Pool Party
-----------------------------------------------------------------------------------------------------------------------
 
Starting with 7 x 12" cardstock
Score at 3-1/16, 5-3/4, 8-13/16, 11-1/2" parallel to the short edge

 Step 1.  Use the template as your guide and please, make a sample one with some scratch paper... just to get the hang of all the cuts and scores....
See score lines here:
  
Step 2:  Then turn to long side and score at 3” from 0 to 12…see next pic
 
Step 3: Now… move over to the 4” mark and take cutting blade to cut from bottom… edge to first 3 1/16” score mark, stop – lift the blade and without moving the cardstock… move the blade to the second score mark and start to cut from that point to the end or top if looking at pic …  so the only area not cut is the 2nd square that’s labeled “Bottom” in the schematic – first pic.. or see pic below here:
 
*** You now have to be very careful… do not remove the flaps…  turn the cardstock as in the pic below and measure about 1.5” from the score mark on the second square (the only one not cut) so you are removing the long flap on the right… see pic on left... do the same from the first score mark 1.5” to the left and remove that section as well – pic on right here: 


 This is what your pic should look like now:


Candy box flap construction:

At this point you can create the flaps for the bottom of the box and the little flaps(and hinges)  that will tuck in the box to hold the lip from falling open. See pic here for what the cuts will look like:


Step by step to cut ...

  1. Cut the first 3 1/16” score mark to the 3” score mark and snip off at an angle into the first square and do the same from the 5 ¾” mark.. cut to the 3” score and snip a small angle to the right so it matches the pic below.
  2. Take the cardstock and move it to the 2 ¼” mark (see pic.. the blade is sitting on the cardstock at the 3rd score mark and the 2 ¼” mark), you are going to cut from this point to the top.  This will create the box opening…
 
  1. Now turn the cardstock so you can snip into the last 5 ¾” flap at an angle to the left.  See Pic below here: 
 
    4.  Almost done!  Whew!  Now we will concentrate on the hinges of the box flap (in pic above… the “T” above the cutting bar.

 
      5.  Pic A: snip about ¼” (see where scissors are inserted), make a small triangle by angling the scissors as shown.. cut slowly and only to about a 3/16” mark from the edge of the 1 1/2” tab.  (In the pic.. you see a cut mark already there… I did this prior and you can too.. I cut straight to about ¾” from inside score mark) and turn your scissors to cut a skinny strip to the end of the tab.  Do the same for the left hinge….See pic B…
 
 Pic A
 Pic B

  1. This is what we have now: Fold your score marks as shown and take a corner rounder and round off the edge of the flap where the hinges are attached to.. this will finish the flap nicely.
  1. At this point.. if you plan on adding additional cardstock and/or designer paper to the side of the box to decorate ... you will want to do that before you assemble the box.. much easier and I will go into that now. Otherwise, assemble box as in Step 9 below.

    1. Here are some measurements for cardstock squares to decorate your box:

    1. **If you are double layering (cardstock and then a designer paper on top)...  just make the top layer of paper 3/16" smaller than these cardstock measurements in order for your layering to be even. See pic here for sample of paper layered on the red cardstock... 

 
       c.     Decorate all sides of box as you wish… leave the front of the box with no embellishments except for the layered cardstock… you will want to add the embellishment later so it creates the box closure correctly…
 
So, now you have a box with the squares of cardstock and maybe some designer paper adhered to it.  You can now go to step 9.

  1. You will use a strong adhesive ( I used sticky Strip) for the two flaps on bottom of box and the ½” flap that will close the cube (box)… See pic for how you want to close here:   For a stronger finish, tuck the bottom flaps in and adhere to the bottom of box… when you finally assemble, you will adhere the box to a base in a later step.  Adhere your box… making sure it’s all straight.

  
  1. To create the base for the box:  Piece of chipboard and two cardstock squares in 3 x  3 3/8” measurements … adhere each cardstock piece to both front and back of chipboard.  You can ink the edges of the chipboard in the same color of the cardstock you are covering with…  with a sponge so you don’t see the chipboard edges.  You can also use a coordinating marker.  Adhere the box bottom to the base using sticky strip again.

11.  To create the box lid:

a)    Score 4-1/4 x 4-5/8" piece of coordinating cardstock at 3/4" on all sides. Cut and taper the corners, then adhere little flaps under the lid.

b)    Measurements for lid trim in coordinating cardstock and Designer Series Paper decorating the lid:

c)     Cardstock: 2 -  9/16” x 2 1/2” for front and back flaps and 2 at 9/16” x 2 7/8” for side flaps.

d)    DSP: 2 – 3/8” x 2 3/8” strips for front and back flaps and 2 at 3/8” x 11/16” for side flaps.

**Decorate the top of the box as you wish.

The front of the box should be decorated with some sort of embellishment (such as a punched shape or label) that can be adhered with dimensionals and it should be overlapping the flap a little bit so the flap stays shut.  See finished pic here:


More views.... I love it!


Until next time... hope my instructions aren't too jumbled.
 
Sandra