
For Details on the current promotions... Please visit my page here.
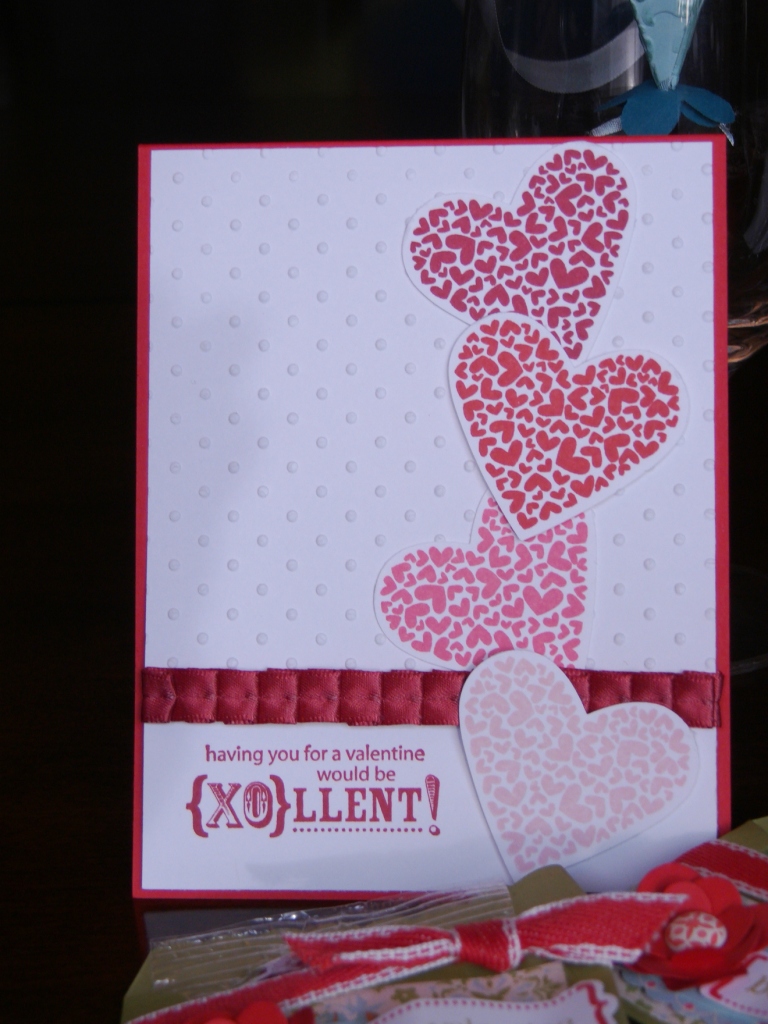
Here I created a box to keep a set of 6 cards and envelopes...The beautiful card was created by Riley Fitzgerald, and I just had to make a box to match... or almost match...
it's decorated with Calypso Coral (I'm loving this beautiful color more and more) and the Everyday Enchantment Designer Series Paper from the Saleabration mini catalog.. it also showcases the coordinating brads and colorful ribbon. You're wondering how I made that beautiful design along the front of the box....well, in the Occasions Mini Catalog, Stampin'Up! is now carrying wafer thin dies... like the Spellbinder ones? anyway, they are super thin and one of the new ones creates this beautiful scalloped edge to any card, or design. In addition, new also is the coordinating embossing folder that makes the matching embossed line on the scallop... I LOVE LOVE LOVE this new mini. The sentiment is mounted on the other new Framelits die...that nest together in the Labels Collection... of course, there is a heart collection one too!!! Soooo much to see in this new mini catalog... Available Now through April 30th..


Here I recreated a Love Coupon Folio!! It is so easy and so much fun... you can make one for any occasion, Anniversary, romantic gift, birthday... anything!! Just use your imagination for the inserts... the rest I can show you. This was the idea of another fellow demonstrator, Mary Brown... thanks Mary!!! and I changed up a few things to make it more me..
Cover of Folio

Inside the Folio there are 10 tabs that hold the coupons nice and snug...

Here they are all spread out.... I made these real quick using the new Stamp set: PS. I Love You.. in the Occasions mini and 2 dies... the Two Tags (for the sayings) and the Pillow Box. for the pockets. On the front cover I used the beautiful Vintage Wallpaper Textured Embossing folder... Love all these toys!! Stamp and punch out circles in 1 1/4" and a mat in 1 3/8" and you are set.

The pockets empty...

Another close up at the coupons.

The beautiful Book...decorated in the Everyday Enchantment Papers from the Saleabration mini... don't wait!!! I'ts only avail for a short time...

This is just a trio of fun cards and a little something I came up with that can be a gift for a good friend, Teacher, Mom...anyone really...

This is what I came up with from a little plastic box (for HP floppys) that a friend gave me... I use them also to house my mat and piercing tools ...it's the perfect size to hold the 4x4 mat and piercering tools.... So, with this, I used the beautiful Twitterpated Designer Series Papers in the new Occasions Mini (pg 13)... I love these color combos... Also, featured are the framelits Labels collection dies and the new every sooooo soft Pleated Satin Ribbons... they come in 4 colors... here I used the Baja Breeze... Oh, and the coordinating Twitterpated designer buttons!! They are soooo cute. Sprinkled a little bit of the tiny pearls around the sentiment and spritzed with Vanilla the back Red...it's all shimmery.. and the flowes were colored in Riding Hood Red Blushing Bride and Island Indigo... with a sponge... again I used the Vintage Wallpaper Textured Embossing folder for the front cover...

Here is the box open... the lid houses a monthly calendar (that you can pull out and replace each year), in the middle a holder with a mechanical pencil, and the bottom houses a note pad of sticky notes... they can also be pulled out to be replaced...

Isn't this fun? My very own idea!!! I love to alter stuff!!

Of course, I had to add a little something to the back... from the inside.. this stamp set is one of my fav's now: Creatively Yours... it has many different sayings that you can finish your wonderful creations with... this one says: Made just for you...

These I love... ok, so I love all my stuff...LOL... can't help it.. I have fun playing.... These are cornucopias for anyone!! Could be Teacher,Mom, Sister, Aunt, Friend...etc. Just a goody bag made by you!! This uses the Petal Cone Die and the Vintage Wallpaper Textured Embossing folder (yes, again), and I colored the surface with an ink pad to showcase the embossing on the cone and added some designer paper on the little flaps and added coordinating in color brads to hold the petal flaps. I ran some Pool Party Binding ribbon through to the bottom to create a handle and added a little flower on the bottom. Inside, I added some candy in a bag with a coordinating tag.

This is my Pink and Red Version... love it with the little hearts on it.

Showcasing the Twitterpated papers, and scallop die cut on the card. Also hanging next to the sentiment is the new Heart Trinkets... in brushed silver.... they are of beautiful workmanship and quality!! The array of hearts were made with a small sizzlet (Fashionable Hearts) that punches and embosses 5 hearts of different shapes and designs all in one run... from the Occasions mini. Created by Margaret De Witt... with a twist or two of my own.

This is a must make project... wait til Christmas!!! The creator of this is genius... Brenda Quintana!! I just used her idea and went for it... using the Twitterpated papers, the Heart dies and the new ribbons... OMG!!! This is only about 10 inches tall to the top of the heart!! by like 4.5 inches wide... sooooooooo cute... you can hide any kind of little treat in the little drawers and count down to your favorite occasion or holiday!! The little drawers are made using the Petal Card Double Punch and it punches and scores the fold lines all in one and I used the new Simply Scored Tool to make the box... what a cinch!!!

The base again using the Framelits dies in the Labels collection...

Two more Cards... Having fun with the Everyday Enchantment Papers... and Heart punches.. PS: I love you stamp set... Over and over... many images in this one to use.... The Heart one courtesy of Mindy Backes ...

This was a little different, but I've been wanting to piece a stamped image, and the coffee pot was perfect! Thank you Riley Fiztgerald!!

This is a Valentine Cupcake kit I put together... was wondering what to do with all these empty boxes??? Tah Dah!!! Cupcake kits!!! It has 8 cupcake wrappers (pink and red dots) and 8 cupcake decorative toppers... oh, and in the heart on top of the box... Yup, I added real sprinkles you can use for the cupcakes in coordinating colors... Like the little treat box/card? Attach to the ribbon and Viola!! Can be used for any occasion in any design.

Here is a 12x12 Layout using the Everyday Enchantment DSP that I totally CASE'd from another talented Demo...Denise Cox... I added a few things and worked on my butterfiles, but I LOVE THIS!!! Can't wait to have some Spring Pics to put in it...

close up of the Butterflies....


Side view...

This is my creation for Valentine's Day...
I have to finish the second page, but it's Red and Blushing Bride on top of Soft Suede Cardstock... added the blush pleated ribbon, I then used the Everyday Enchantment Paper in the background... I really like how this pulled together...


This is my creation for Valentine's Day...
I have to finish the second page, but it's Red and Blushing Bride on top of Soft Suede Cardstock... added the blush pleated ribbon, I then used the Everyday Enchantment Paper in the background... I really like how this pulled together...

I cut out a large scallop heart, stamped all over it and then cut out another heart in the center... added some tiny pearls, added some other color hearts with Crumb Cake binding ribbon decorated with more heart and key trinkets.

PS: I Love You stamp set on the bottom heart. Now, I cut out a bunch of hearts with the little sizzlet die... see the pink heart with the polka dots.. the little frames on the bottom left are the left over frames... I immediately thought of photo negatives... the kind you use on a projector... Anyway (now I'm dating myself... hehe)... I thought they added a bit of fun to the page.
 Second page closeup... LOVE the Pearl accents!!! They come in 4 sizes now and I am using them everywhere... also used the antique brads... so pretty.
 Lastly I used the ovals die in 2 sizes and teh ovals frame texture embossing folder layered with some love and mini bitty pearls.
It all came together nicely... I think anyway...

Calendar/Memory Holder
This is totally my creation to hold an 8x8 page next to a Monthly calendar/journal...The page inserts into a page protector, so you can change out each month or quarter... nd then the calendar/journal is housed on the right separately from the page so you can journal on it. It all stands up like an open card on your desk. The back side... has a plastic box, per se... the holds the remaining months nice and tucked away until you need to change them... add some photos and you are done. Would you like a kit? Post a comment with your email address and I'll give you all the details. Here is a sneak peek!
Standing up...
 January Layout.. huge snowflakes with a llittle blitz on the bottom...

February Page... Love this paper... Worked out so easy!!

March and April Pages...
Here in Green is March, with the lovely Label Die cutout for a pic frame and the Everday Enchantment papers... a few pearls drizzled here and there... and again in Green the Easter Bunny hiding behind the basket of Eggs. The ears are made with the new Bigz L Die Dresden Designs that has 2 size petal? design to cut out? Anyway... I thought of bunny ears... had fun.
 This is the clear box that is attached to the back of the Folio... it holds all your other months nice and neat all n one place.
 When you are all done with a month... simply remove the page from the front with the journaling calendar and add them to a 12z12 page and put in an album. Viola!! Multiple uses out of this project.
Here are some other treat holders... basket with little purse treat holders.. Yum Ghirardelli Chocolate Raspberry!!! Easy to make... You can make 50 in under an hour... easy!!

Here is the basket with a Box that holds cards in it... decorated with the same papers and just a few decorations... both of these were made using the scalloped envelope die and the pillow box die... QUICK QUICK QUICK projects!! Let me show you how!! I put a set of 8 cards with envelopes in the box, but it'll hold about 25 or so.
 Close up of the box, cards and little envelopes (Diana Carr) ... too cute!!
 Fun, easy Valentine Card... CASE'd from Mary Cavalier, another talented demonstrator... just changed up the colors a bit.
 Another Case... from Becky Robert's... she's amazing and I had to make these... I have to have the lollipops each year. Love them... again using the scallop envelope die...
 This is a case of an Easel Card... I had to have this one... Absolutely stunning job by Karen Gilbert ... very easy... using the Heart Framelits to make and I Heat embossed with clear over Cherry cobbler the stamped image. Not much work really.
 Front view... showcasing the pleated satin ribbon... did I tell you how soft and pliable this is? Wonderful ribbon to work with.
 That's it folks... I'll be busy with Spring next... I'm just swamped right now, so I may not post for a while. Thanks for stopping by to take a look.
Keep in touch... I'll be posting when I will have my next Open House... 'til next time!!
Happy Stamping!
Sandra

PS: I Love You stamp set on the bottom heart. Now, I cut out a bunch of hearts with the little sizzlet die... see the pink heart with the polka dots.. the little frames on the bottom left are the left over frames... I immediately thought of photo negatives... the kind you use on a projector... Anyway (now I'm dating myself... hehe)... I thought they added a bit of fun to the page.


It all came together nicely... I think anyway...

Calendar/Memory Holder
This is totally my creation to hold an 8x8 page next to a Monthly calendar/journal...The page inserts into a page protector, so you can change out each month or quarter... nd then the calendar/journal is housed on the right separately from the page so you can journal on it. It all stands up like an open card on your desk. The back side... has a plastic box, per se... the holds the remaining months nice and tucked away until you need to change them... add some photos and you are done. Would you like a kit? Post a comment with your email address and I'll give you all the details. Here is a sneak peek!
Standing up...


February Page... Love this paper... Worked out so easy!!

March and April Pages...
Here in Green is March, with the lovely Label Die cutout for a pic frame and the Everday Enchantment papers... a few pearls drizzled here and there... and again in Green the Easter Bunny hiding behind the basket of Eggs. The ears are made with the new Bigz L Die Dresden Designs that has 2 size petal? design to cut out? Anyway... I thought of bunny ears... had fun.


Here are some other treat holders... basket with little purse treat holders.. Yum Ghirardelli Chocolate Raspberry!!! Easy to make... You can make 50 in under an hour... easy!!

Here is the basket with a Box that holds cards in it... decorated with the same papers and just a few decorations... both of these were made using the scalloped envelope die and the pillow box die... QUICK QUICK QUICK projects!! Let me show you how!! I put a set of 8 cards with envelopes in the box, but it'll hold about 25 or so.




Keep in touch... I'll be posting when I will have my next Open House... 'til next time!!
Happy Stamping!
Sandra


